How to Create a Windows 11 24H2 USB for Unsupported PCs?
November 12, 2024
Installing Windows 11 on older hardware can be challenging due to the strict system requirements set by Microsoft. These requirements include the need for UEFI firmware with Secure Boot capabilities and TPM version 2.0. Many older PCs do not have these features, making it difficult to meet the criteria for a successful installation.
Fortunately, you can use a special application called Rufus to create a bootable USB drive that bypasses certain requirements, such as TPM 2.0 and Secure Boot. Additionally, Rufus allows you to skip the need for an online Microsoft account during installation, enabling you to set up a local account instead.
What Do You Need?
- Windows 11 ISO File
To download the latest Windows 11 ISO file, follow these steps:

- Visit the official Microsoft website: Go to the Windows 11 download page at https://www.microsoft.com/en-in/software-download/windows11.
- Scroll down: Locate the section titled "Download Windows 11 Disk Image (ISO) for x64 devices".
- Select the version: Choose "Windows 11 (multi-edition ISO for x64 devices)" from the drop-down menu.
- Choose the language: Select your preferred language from the list.
- Confirm and download: Click the "64-bit Download" button to start the download.
- USB Drive
You will need a USB drive with at least 8 GB of available space. Make sure there are no important files on the USB drive, as it will be formatted during the process.
- Rufus App
Rufus is a free, open-source utility for Windows that formats and creates bootable USB flash drives.
Visit the Rufus website at https://rufus.ie/en/ and scroll down to the download section to download the latest portable version of Rufus.

Creating a Windows 11 24H2 USB Installer for Unsupported PCs
Step 1: Launch Rufus
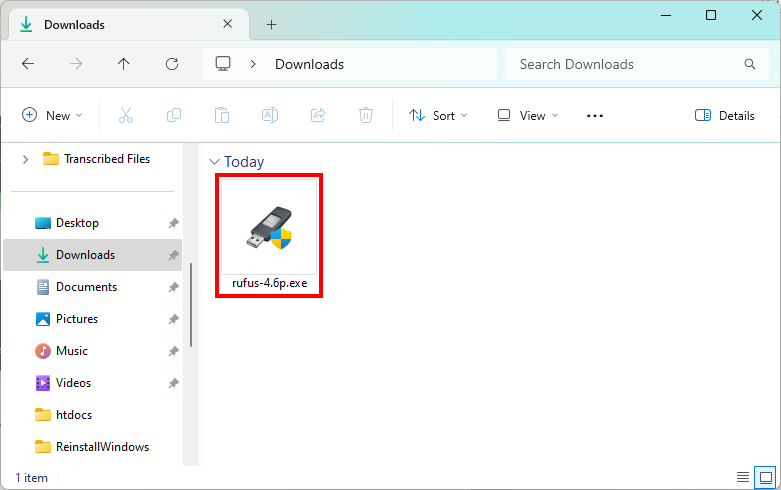
Navigate to your download folder and double-click the Rufus file to open it.
Step 2: Configure Rufus Settings
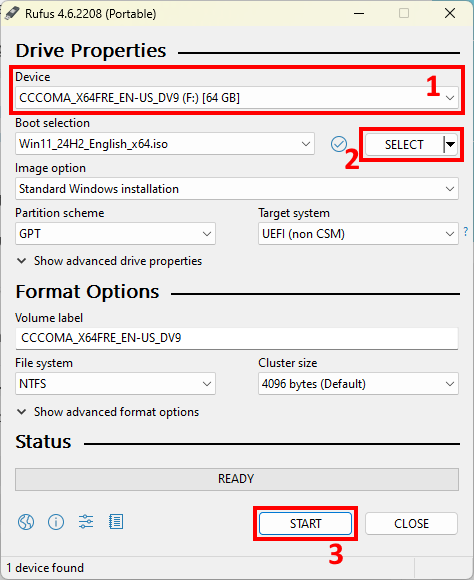
In the Rufus interface, select your USB drive from the device drop-down list. Next, click on "SELECT" and browse to the location where you downloaded the Windows 11 24H2 ISO file. Choose the ISO file and click "Open." Finally, click the "START" button to proceed to the next settings.
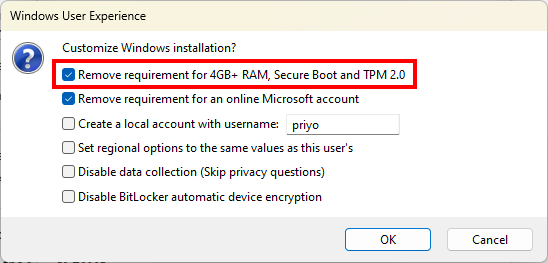
A Windows User Experience window will appear. Make sure to check the options to remove the Secure Boot and TPM 2.0 requirements. Additionally, you can disable the requirement to use an online Microsoft account. Click the "OK" button to start creating the USB installer.
Step 3: Wait for the Process to Finish
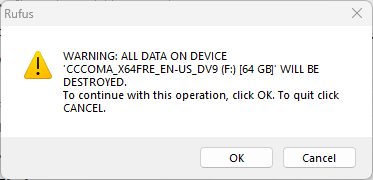
Before Rufus makes any changes to the USB drive, it will display a warning message indicating that all data on the USB drive will be erased. Click "OK" if you are ready to proceed.
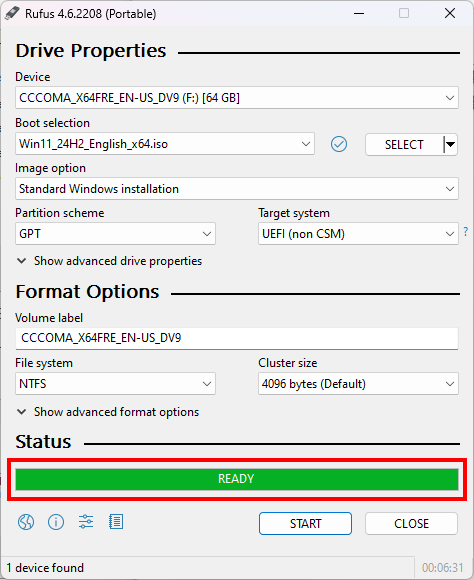
Once the process is complete, you will have a bootable USB drive that allows you to install Windows 11 24H2 on unsupported hardware.
Latest App Updates
April 16, 2025
February 11, 2024
February 06, 2025
January 30, 2025
Windows Tips and Tricks
How to boot into safe mode when you can’t sign in to Windows 11?
How to Create a Windows 11 24H2 USB for Unsupported PCs?
How to Reinstall Windows 11 Without Losing Personal Data?

How to Join Windows Insider Program?

How to Install Python on Windows 11?
More Tips and Tricks >>>


